


How to Identify and Fix Gas Leaks in Your Cooktop?
Gas leaks in burner cooktops are a serious hazard, as they can lead to dangerous fires, explosions, or health issues due to inhaling toxic fumes. Knowing how to identify and fix gas seepages is crucial for the safety of your kitchen and staff. This detailed blog will take you through the helpful methods to detect and repair gas leaks in your cooktop.
A flat culinary surface perfect for preparing a variety of foods like pancakes, eggs and more. Check out our Hot Plate Griddle.
Table of Contents
-
Introduction to Gas Releases
-
Safety Precautions
-
Tools and Materials Needed
-
Identifying Gas Leaks
-
Signs of Gas Discharges
-
The Soap and Water Test
-
Using a Gas Leak Detector
-
Fixing Gas Leaks
-
Tightening Connections
-
Replacing Damaged Parts
-
Applying the Gas Sealant
-
Prevention Tips
-
Conclusion
1. Introduction to Gas Leaks
These issues occur when gas is unintentionally released from the gas lines, connectors, or cooktop itself. Many factors, such as wear and tear, improper setup, or manufacturing defects, can cause these discharges. The most common type of gas used in cooktops is either natural gas (methane) or liquefied petroleum gas (propane). Both types are highly flammable and can pose significant risks if handled improperly.
2. Safety Precautions
Before attempting to identify or fix a gas leak, it is essential to follow these safety precautions:
-
Please switch off the Gas Supply: Find the gas shut-off valve and switch it off to stop further gas release.
-
Ventilate the Area: Let fresh air circulate and disperse any accumulated gas by opening doors and windows.
-
Avoid Flames and Sparks: Do not use any open flames, electrical appliances, or devices that could create sparks while working near a potential discharge in your gas burner cooktop.
-
Use Protective Gear: Use gloves and safety goggles to safeguard yourself from impending hazards.
3. Tools and Materials Needed
To identify and fix gas seepage, you will need the following tools and materials:
-
Adjustable wrench
-
Screwdrivers
-
Soapy water solution (mix water and liquid dish soap)
-
Gas release detector (optional but recommended)
-
Gas leak sealant or tape
-
Replacement parts (hoses, connectors, etc.)
-
Protective gear (gloves and safety goggles)
4. Identifying Gas Leaks
Signs of Gas Discharge
The primary step in finding a seepage in your commercial gas burner cooktop is to be aware of the common signs:
-
Smell: Natural gas has a distinct odour similar to rotten eggs due to the added odorant (mercaptan). If you smell this, it strongly indicates a gas discharge.
-
Hissing Sound: A whistling or hissing noise near the gas lines or cooktop can indicate a gas release.
-
Dead Plants: If indoor plants near your cooktop suddenly die, it could be due to a gas leak.
-
Physical Symptoms: Headaches, dizziness, nausea, or difficulty breathing near the cooktop can be signs of gas exposure.
The Soap and Water Test
The soap and water test is one of the simplest gas discharge detection methods. Follow these steps:
-
Prepare the Solution: Mix water with a small quantity of liquid dish soap in a spray bottle.
-
Apply the Solution: Spray the soapy water onto the gas lines, connectors, and any areas where you suspect a seepage.
-
Observe for Bubbles: If you see bubbles forming, it indicates a gas leak. The gas released from the discharge leads to bubbles in the detergent-filled water.
Create a smoky flavour and barbecue-style food in your restaurants, steakhouses, and catering businesses. Get a Chargrill Stove for your kitchen now.
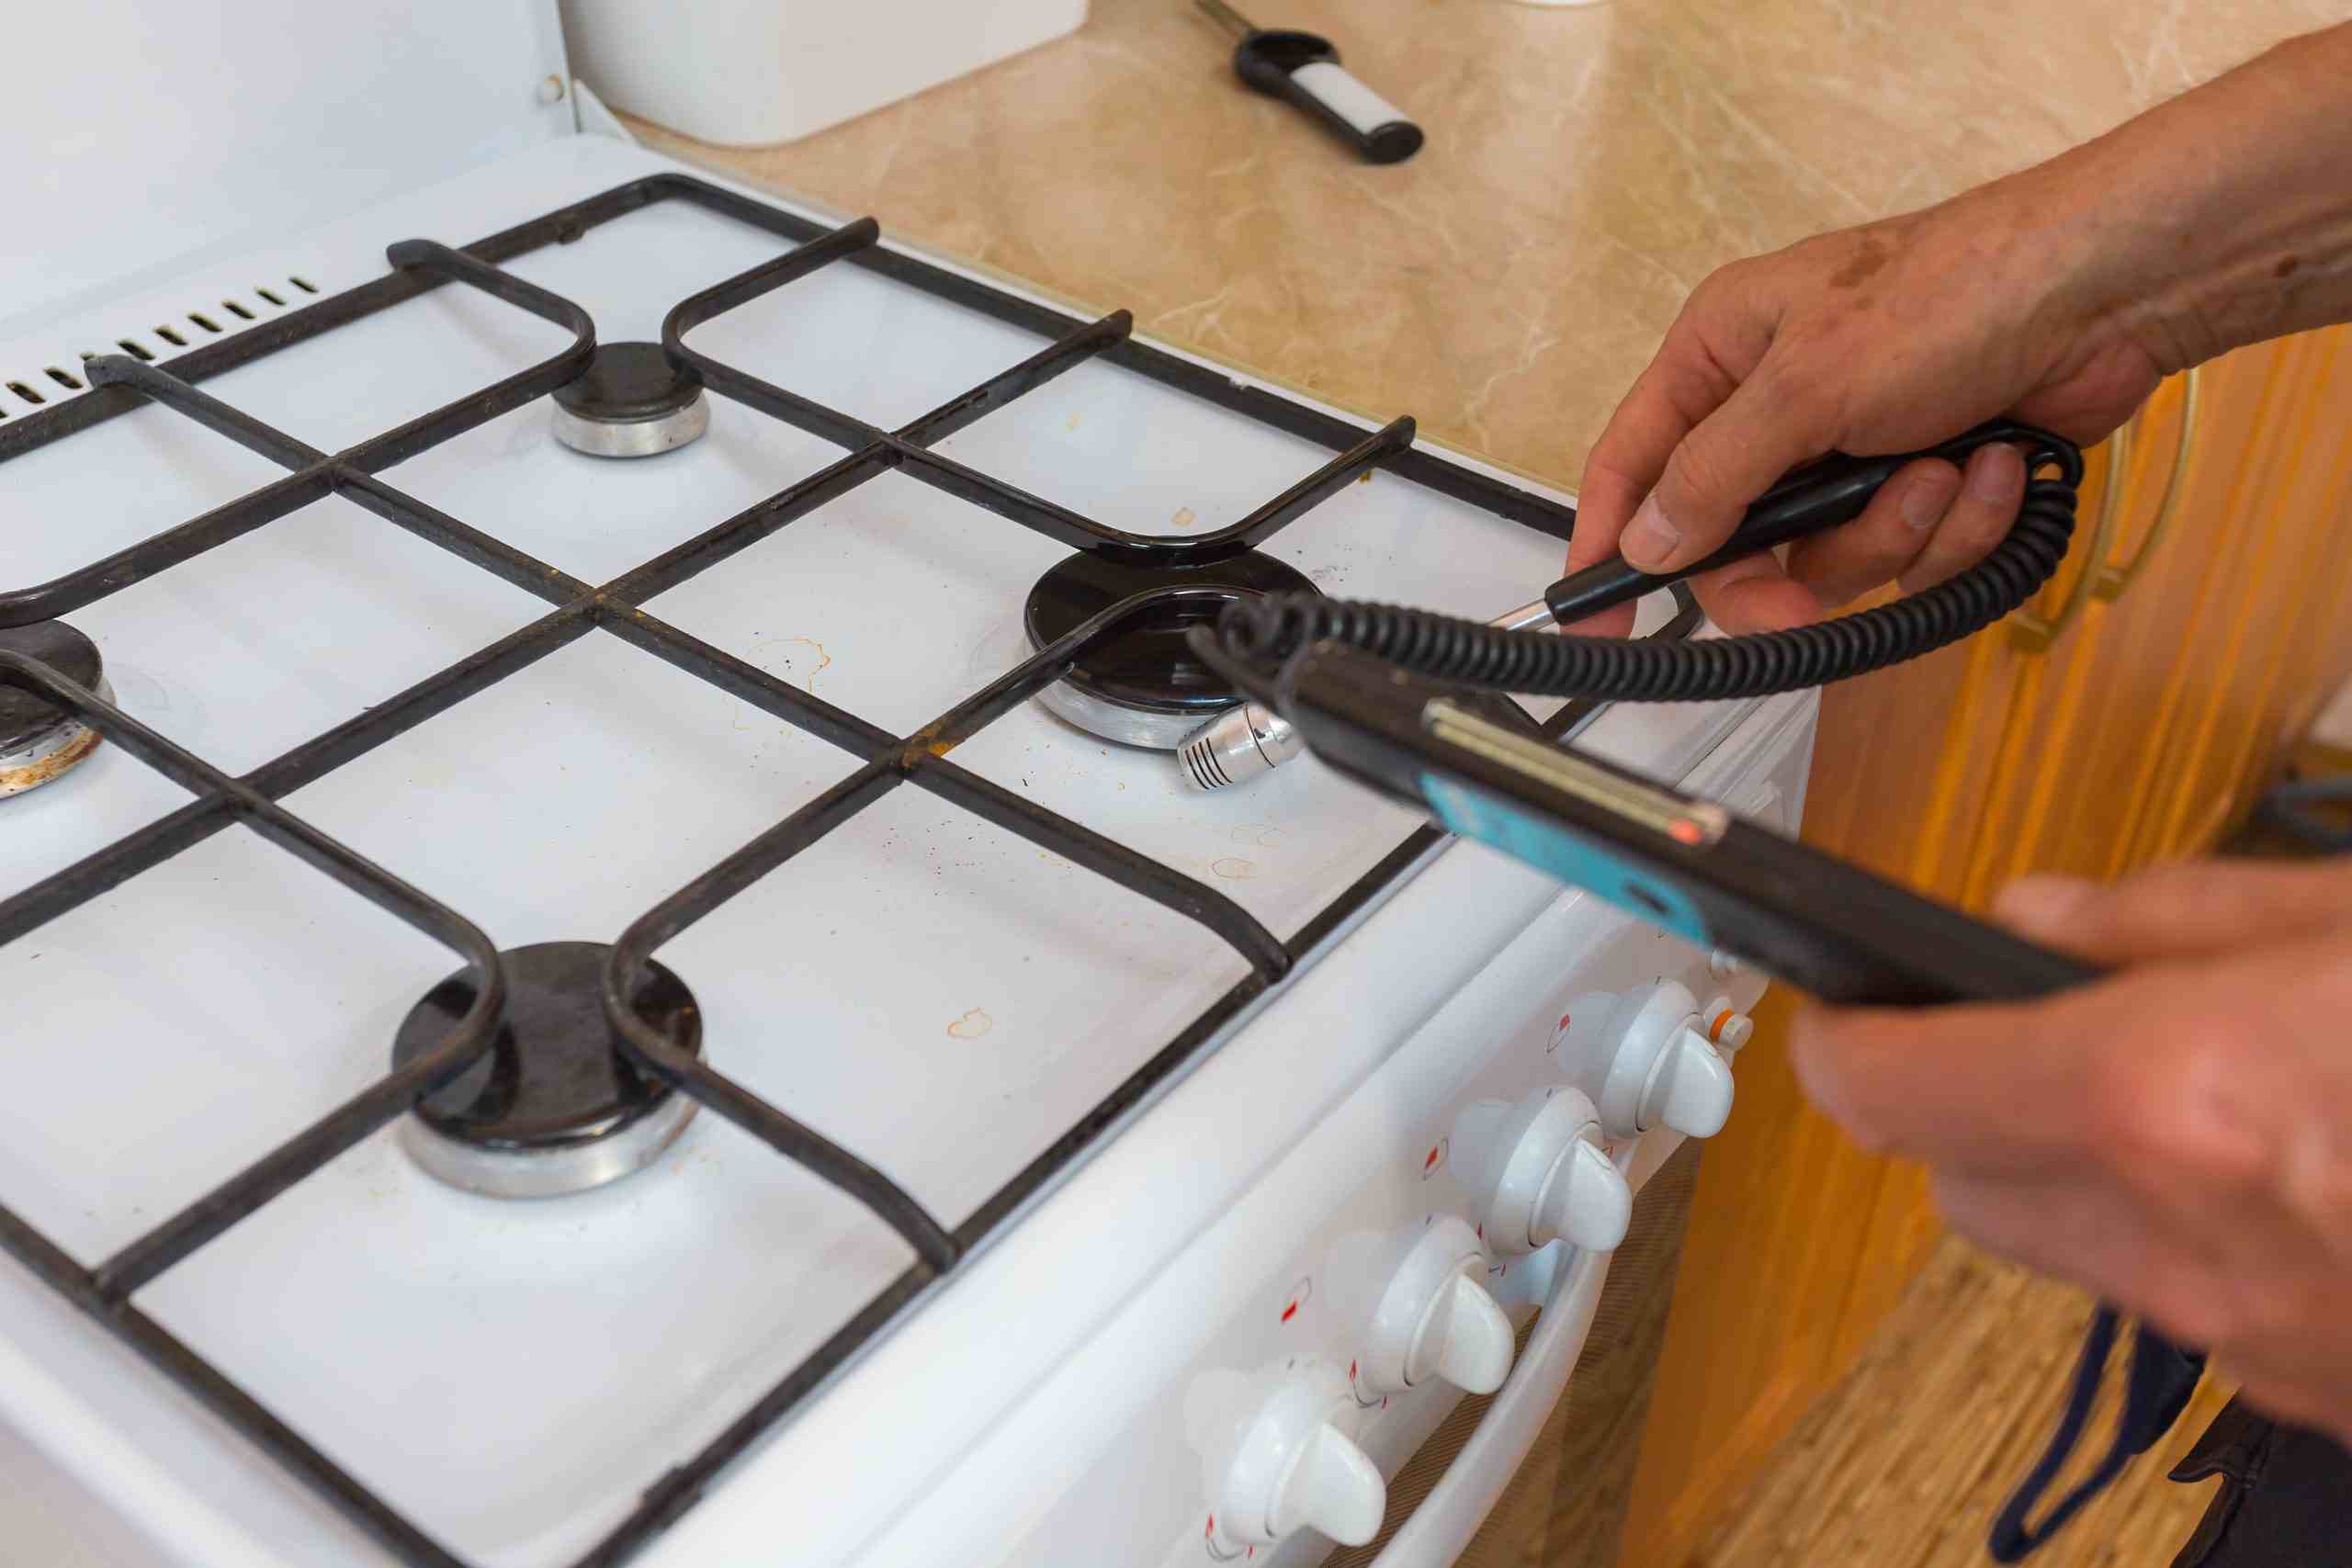
Using a Gas Leak Detector
A gas discharge detector is a more precise tool for identifying seepages in your gas burner cooktop for sale. Here’s how to use one:
-
Turn On the Detector: Follow the manufacturer’s instructions to power the gas release detector.
-
Scan the Area: Hold the detector close to the gas lines, connectors, and cooktop. Move it slowly to ensure thorough coverage.
-
Observe the Readings: The detector will emit a sound or display a reading if it detects gas. Pay attention to areas where the readings are highest.
5. Fixing Gas Leaks
Tightening Connections
Loose cables are a typical reason for gas release. Here’s how to fix them:
-
Identify the Loose Connection: Use the soap and water test or gas release detector to pinpoint the exact location of the discharge.
-
Tighten the Connection: An adjustable wrench or appropriate screwdriver tightens the gas line connections. Try not to excessively tighten, as this step can ruin the fittings.
Replacing Damaged Parts
If tightening the connections does not resolve the issue, you may need to replace damaged parts:
-
Switch Off the Gas Connection: Check whether the gas supply is switched off before proceeding.
-
Remove the Damaged Part: Use the appropriate tools to disconnect and remove the damaged hose, connector, or other components.
-
Install the Replacement Part: Fit the new part securely, ensuring all connections are tight when you buy gas burner cooktop.
Applying Gas Leak Sealant
Gas leak sealant or tape can be used to seal minor seepage:
-
Clean the Area: Wipe the area around the impacted space to remove any dirt or debris.
-
Apply the Sealant: Follow the manufacturer’s instructions to apply the sealant or tape to the affected area.
-
Let the Sealant Dry: Give the sealant time to cure as instructed before turning the gas supply back on.
6. Prevention Tips
To prevent future gas discharge, consider the following tips:
-
Regular Maintenance: Schedule regular inspections and maintenance of your cooktop and gas lines by a qualified professional.
-
Proper Installation: Ensure a certified technician installs gas lines and cooktops correctly.
-
Use Quality Parts: Invest in high-quality gas lines, connectors, and other components to reduce the risk of release.
-
Be Vigilant: Stay alert to any signs of gas seepages and address them promptly.
A small, high-powered stove designed to heat woks quickly and efficiently. Check out our classic Wok Burners.
Conclusion
Identifying and fixing gas discharges in your gas burner cooktop is vital for preserving a secure and healthy kitchen climate intact. By following the steps outlined in this guide, you can effectively detect and repair a gas release, ensuring the safety of your kitchen and property. Remember always to prioritise safety and seek professional assistance to handle gas-related issues when in doubt.


